
How to Clean a Mechanical Clock Movement (Step-by-Step Guide)

A mechanical clock movement can run for decades—until old oil dries out, dust packs into pivot holes, and friction slowly steals power from the gear train. Cleaning a movement is not the same as spraying something inside and hoping for the best. Done properly, cleaning removes abrasive grime and expired oil, then adds fresh lubrication only where it belongs. Done poorly, it traps moisture, strips finishes, and accelerates wear.

This guide walks you through a safe, practical approach. You’ll learn when cleaning a clock movement at home makes sense, when it does not, which cleaning solutions to use, and how to clean and oil a movement step by step. If you need proper oils, small tools, or replacement hardware during the process, keeping a consistent parts source—such as SoflyPart—helps avoid improvised fixes that shorten a movement’s life.
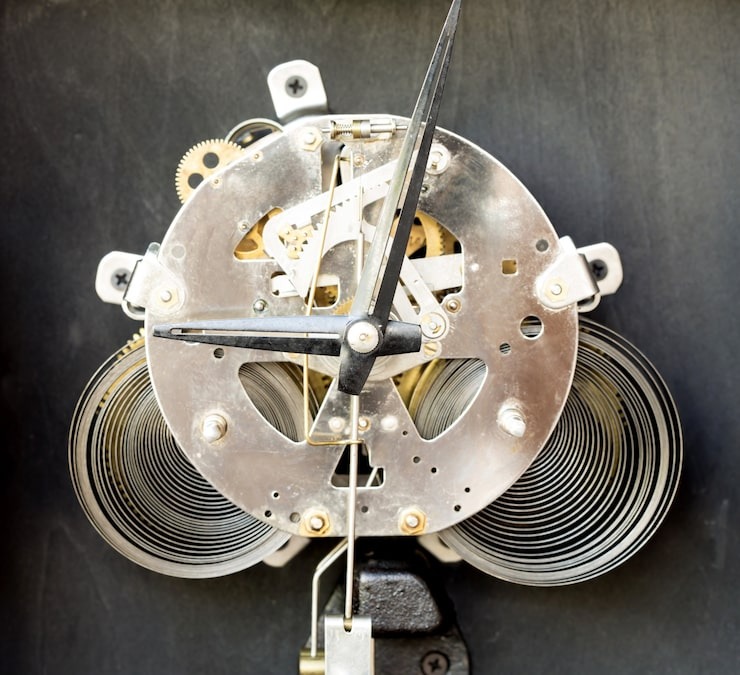
Clock Movement

Can You Clean a Clock Movement at Home?

You can clean some clock movements at home, but only in the right situations. DIY cleaning works best on common, modern mechanical movements with straightforward layouts and readily available parts. Once value, rarity, or complexity increases, the risk rises quickly.

DIY Cleaning Makes Sense If:

  • The movement is modern and widely used, not rare or collectible.

  • You can access the movement without forcing plates or levers.

  • Symptoms point to dirt or dried oil, not broken or bent parts.

  • You are comfortable documenting disassembly step by step.

Stop and Consider a Professional If:

  • The clock is antique, sentimental, or high value.

  • You see corrosion, cracked plates, bent pivots, or missing teeth.

  • The movement includes complex strike or chime trains you have not worked on before.

  • You lack the tools to safely control mainsprings or weights.

Practical rule: if you are unsure, a light external clean now and a professional service later is far safer than a teardown you cannot confidently reassemble.
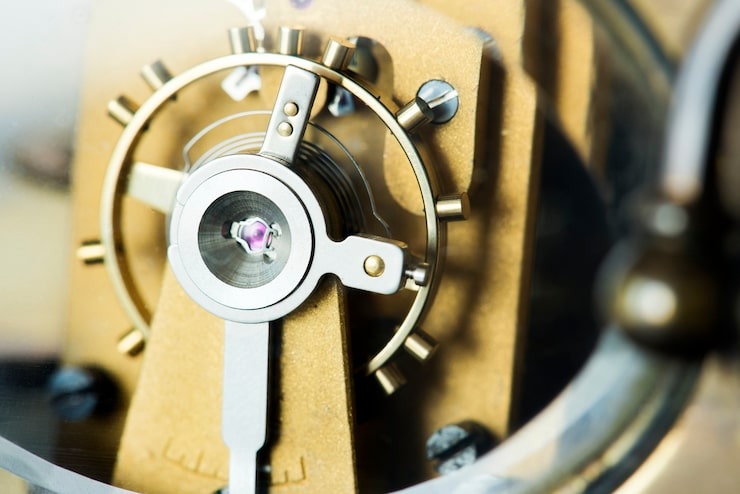
mechanical clock movement

What Are the Signs a Clock Movement Needs Cleaning (Not Just Oil)?

Most clock problems are not caused by “dry” movements. They are caused by contaminated oil.

A movement likely needs cleaning if:

  • It runs briefly, then stops.

  • Timekeeping drifts more than it used to.

  • The tick-tock sounds uneven or weak.

  • Dark residue appears around pivot holes.

  • The clock only runs when perfectly level or after a small nudge.

If you see thick, dark buildup, adding fresh oil almost always makes things worse. Cleaning must come before lubrication.


What Tools and Supplies Are Needed to Clean a Clock Movement Safely?

You do not need a full professional workshop, but skipping the basics leads to mistakes.

Core Bench Tools:

  • Nitrile gloves to keep skin oils off brass

  • Soft brushes (artist brush and soft toothbrush)

  • Lint-free cloths or shop wipes

  • Cotton swabs (used sparingly to avoid fibers)

  • Small trays or containers for parts

  • Tweezers and precision screwdrivers

  • Hand air blower

  • Phone or camera for documentation

  • Watch loupe or magnifier

Cleaning and Lubrication Supplies:

  • Mechanical clock cleaning solution (ammoniated or non-ammoniated)

  • Distilled water if rinsing is required

  • Proper clock oil

  • Mainspring grease for springs only

Bench tip: standardizing oils and small consumables from one reliable source keeps each service predictable and reduces the temptation to substitute the wrong products.

What Is the Best Cleaning Solution for Mechanical Clock Movements?

Different finishes react differently to cleaners. Choosing the right solution matters.

Cleaning Solution Quick Guide

Situation

Best Starting Choice

Why

Watch-Outs

Light dust and thin oil film

Non-ammoniated cleaner

Gentler on finishes

Needs longer soaking

Heavy black oil sludge

Ammoniated cleaner (carefully)

Cuts hardened oil faster

Avoid lacquered parts

Verdigris or corrosion spots

Mild cleaner, targeted treatment

Limits metal loss

Do not polish aggressively

Antique or unknown finish

Gentlest method first

Preserves originality

Consider professional service

Ultrasonic cleaning

Clock-specific solution

Deep pivot cleaning

Not safe for all finishes

Avoid These Common Mistakes:

  • Household degreasers or vinegar baths

  • Aerosol lubricants or “all-purpose” sprays

Mixing chemicals without knowing residue behavior

Do You Need to Fully Disassemble a Clock Movement to Clean It?

The most effective cleaning always involves full disassembly. It allows proper pivot-hole cleaning and wear inspection.

That said, not every movement needs it immediately.

  • Light surface dust: careful external cleaning may help.

  • Visible dried oil: partial disassembly is safer.

  • Heavy sludge or antiques: full teardown or professional service is the right choice.

Shortcut reality: partial cleaning may improve short-term running, but full cleaning restores long-term reliability.

How Do You Remove a Clock Movement From the Case Safely?

Clock cases and dials are often easier to damage than movements.

Power Down First:

  • Weight-driven clocks: remove weights and secure chains or cables.

  • Spring-driven clocks: let down mainsprings only with proper tools.

Document Everything:

  • Photograph hand positions, levers, washers, and spacers.

  • Take extra photos of strike and chime linkages.

Remove Hands and Dial:

  • Minute hands are usually nut-retained.

  • Hour hands are friction-fit.

  • Never pry a dial—look for pins or screws.

Lift the movement out with both hands and avoid flexing the plates.

Clean a Clock Movement at Home

How Do You Clean Clock Plates, Gears, and Pivots Step by Step?

This general workflow applies to most mechanical clock movements.

Step 1: Dry Pre-Clean

Brush off loose dust and blow debris from gear teeth.

Step 2: Controlled Soak

Use a clock-specific cleaner. Start with short soak intervals and extend only if needed.

Step 3: Gentle Brushing

Lift residue with soft brushes. Aggressive scrubbing removes metal faster than dirt.

Step 4: Focus on Pivots and Pivot Holes

This is where power loss happens. Clean carefully and avoid pushing fibers into holes.

Step 5: Rinse if Required

Follow the cleaner’s instructions and keep moisture controlled.

Step 6: Dry Completely

Blow out liquid and allow extended air-drying before reassembly or oiling.

Bench note: most “it ran worse after cleaning” cases trace back to moisture left in pivot holes.

How Long Should You Soak a Clock Movement?

Always follow the cleaner’s instructions, but safe practice looks like this:

  • Start with gentler dilution for unknown finishes.


  • Check progress every 15–30 minutes.


  • Repeat short cycles instead of forcing long soaks.


If grime does not loosen, the issue is usually access, not solution strength.

How Do You Dry a Clock Movement Without Causing Rust?

  • Use a hand blower to clear liquid from pivots and corners.


  • Air-dry longer than feels necessary.


  • Avoid heat guns or extreme temperatures.


  • In humid climates, dry with a desiccant container.


Only oil once you are confident all moisture is gone.

Where Should You Oil a Clock Movement—and Where Should You Not?

Clock lubrication is precise and minimal.

Where to Oil:

  • Pivot holes, using a tiny drop at the oil sink


  • Specific friction points noted in service references

Where Not to Oil:

  • Gear teeth


  • Escapement surfaces unless specified


  • Random locations “just in case”


Always use proper clock oil. Household oils migrate, thicken, and attract dust.

Common DIY Mistakes When Cleaning Clock Movements

  • Using WD-40 or general lubricants

  • Oiling without cleaning first

  • Over-oiling

  • Skipping documentation during disassembly

  • Forcing parts instead of finding hidden fasteners

Each mistake reduces reliability instead of improving it.

Clean Clock Plates

How Often Should a Mechanical Clock Movement Be Cleaned?

There is no fixed schedule, but practical guidelines help:

  • Inspect if timekeeping changes.

  • Clean when oil darkens or dries out.

  • Dusty or humid environments require more frequent service.

Regularly running clocks benefit from preventative cleaning.

When Should You Stop and Call a Professional?

Stop DIY work if you notice:

  • Bent pivots or cracked plates

  • Oval pivot holes

  • Damaged or dangerous mainsprings

  • Complex strike or chime systems you cannot confidently time

  • Valuable antiques where originality matters

Cleaning alone cannot fix structural wear.

FAQ: Clock Movement Cleaning

1. Can WD-40 be used on clock movements?

No. It attracts dust and causes long-term wear.

2. Can a clock movement be cleaned without disassembly?

Only for light dust. Old oil usually requires disassembly.

3. Is ultrasonic cleaning safe?

Sometimes, but not for all finishes or fragile parts.

4. Why does a clock stop after cleaning?

Common causes include trapped moisture, under-lubrication, or existing wear.

5. What oil should be used?

A dedicated clock oil—never household oil.

Conclusion

Lightly contaminated movements often respond well to careful cleaning and correct oiling. Heavily sludged or antique movements usually require full disassembly or professional service.

And when you need proper oil, applicators, or small replacement parts, relying on a consistent supplier like SoflyPart helps keep repairs precise instead of improvised.