Have you ever thought of making your own watch or make it as a nice present for your best friend?
You can actually design your own watch style! You can choose the color, materials, and even the accessories. Sounds exciting, right?
Building your own watch can actually be easy and fun, but you need to have the right tools and do every step correctly. If you’re considering this exciting idea, just read on!
In this post, we have compiled everything you need to design your own watch – from the tools and parts you need to the step-by-step guide on building a watch!

Before building your own watch, you need to have all the watch parts to make it work properly.
Here are the things you need:
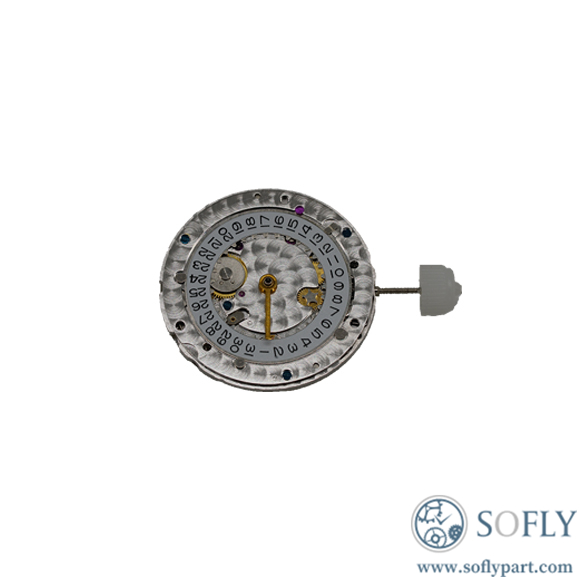
First, you have to choose the movement as this will help you figure out the design of the dial and case.
If you want the second hand on the 9 o’clock position, we recommend an ETA 6497 movement.
But, if you prefer the second hand on the 6 o’clock position, then it’s best you get an ETA 6498.
Although ETA movements are great, they are quite hard to find nowadays.
But, don’t worry! You can still find them in some online stores like eBay or Sofly.
You can buy the dial and hands together with the movement.
For example, if you decide to purchase from online watch supplier like Sofly, you can also order the dial and hands there.
For the case, it should be compatible with the movement you chose.
If you are not sure, you can consult a watch expert, store, or simply search on the internet.
So when you purchase your movement, you can talk to the seller which case is perfect for your watch movement.
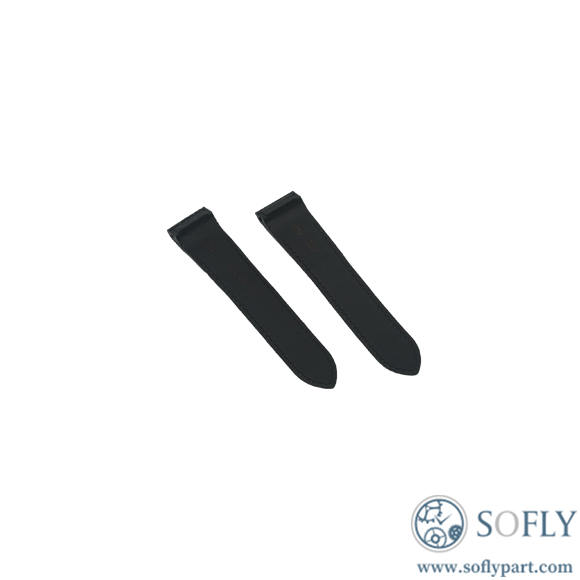
Many online and physical stores offer watch straps so this should not be difficult to find.
You will surely go with the strap that fits the entire layout of your watch, but also consider the quality.
Moreover, don’t forget to compare the prices! You can find high-quality straps that are offered at budget-friendly prices.
Source: Pinterest
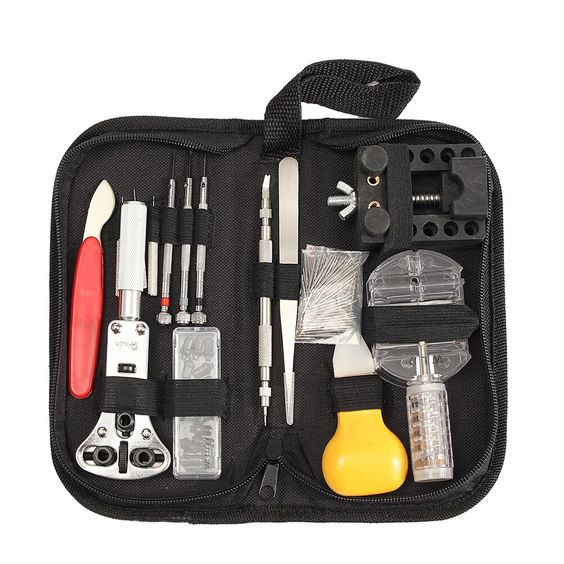
Once you have all the parts, it’s time to gather the tools you’ll need.
If you have a wristwatch building kit, then you’re most likely good to go.
But, if you don’t, here are the tools you should have:
You can easily purchase these repair tools from watch parts sellers online and offline.
When you have all the parts and tools, let’s get started!
The first thing you need to do is to attach the dial into the movement.
Make sure that you adjust the movement so that the stem slot is in the 3 o’clock position and aligned with the date window. The dial is secured unto the movement through the dial feet. Either of the dial foot may bend and if this happens, you can use a pair of pliers to bend them back gently.
The next step is to put the movement and dial into the watch case. Make sure that the dial is facing down to the glass. Also, the date window and case should be aligned. Put the glass side down on a scratch-free surface.
The stem you have is likely too long for your watch, so you have to cut it properly. Before you start cutting, measure and mark the points where you will trim the stem.
There are two ways to trim your stem. The first one is to use a digital caliper (although this is not included in a watch kit) and the second is to use a gauge, which is included in the kit.
Using a Sharpie, marker, or a piece of tape, mark the spot where you want to trim your stem.
If you use a digital caliper, open it to about 15.15mm. Lock it with a nut to avoid it from moving. Use a pair of tweezers to secure the stem over the slot with the threaded edge going above the jaw. Label the exact cut point with your marker at the jaw orifice.
If you use a measuring gauge on a spring bar tool, attach the stem to the tool so that the smooth side is exactly at the center of the zero mark. Label the cut point between the 15mm and 16mm points.
Now, attach the stem into the pin vise. Use a side or end cutter to remove the excess where you labeled the stem. Please be extra careful not to cut too much since a stem will not function properly when it is too short.
If the stem is still long, you can always cut it again after its first cut. After trimming, it’s most likely there’s still a small piece of metal left. Use sandpaper or file to smoothen the edge of the stem.
With your stem still attached to the pin vise, screw the crown into the stem. Take off the crown and stem from the pin vise, then attach them to the movement and case.
Make sure that they fit properly. Insert them slowly and carefully until you hear a “click.” This means that they are fully and correctly seated against the case.
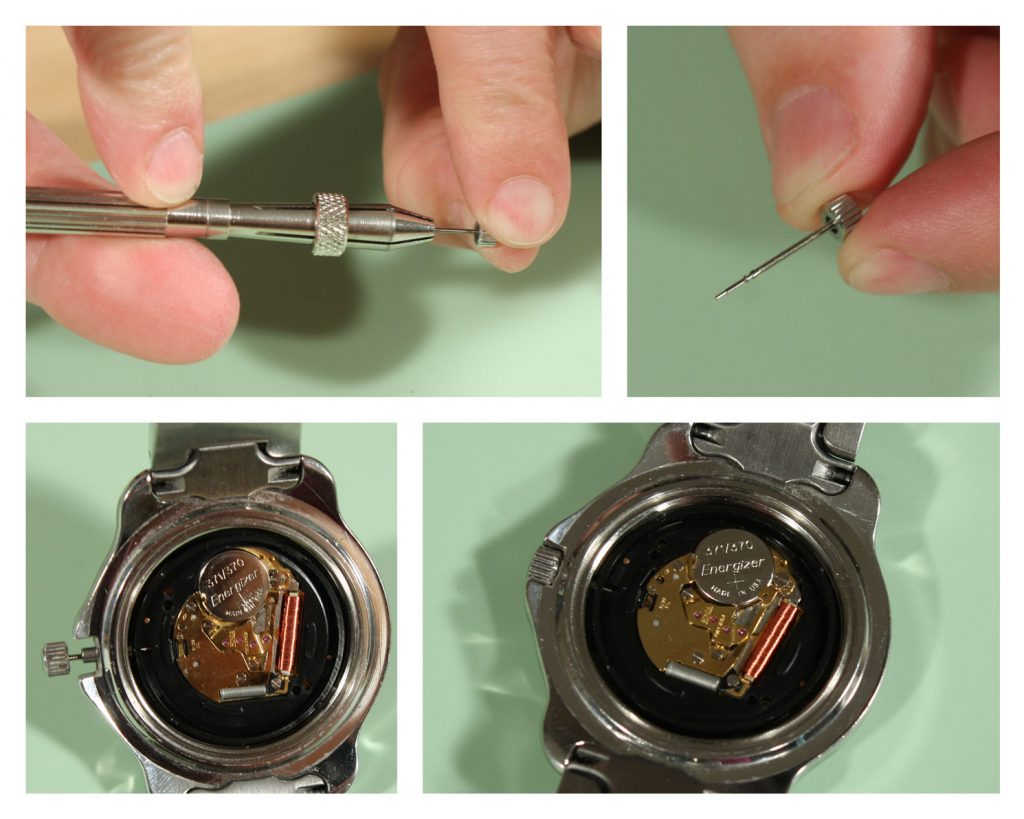
When you are already sure that your stem is the proper length and the crown sits flatly, take off the stem from the watch movement. Remove it by pressing the set lever dimple. You must push the stem fully into the movement before you can take it off. You can find the dimple behind the 4 o’clock point.
With a pointed tool, like a pin pusher or screwdriver, slightly press the dimple and pull the crown and stem out of the watch movement.
Put the stem into the pin vise again but this time, remove the crown. Put a tiny amount of Loctite or glue on the threaded side of the stem.
Then, screw the crown again over the adhesive as far as you can. Set it aside and allow it to dry for several minutes.
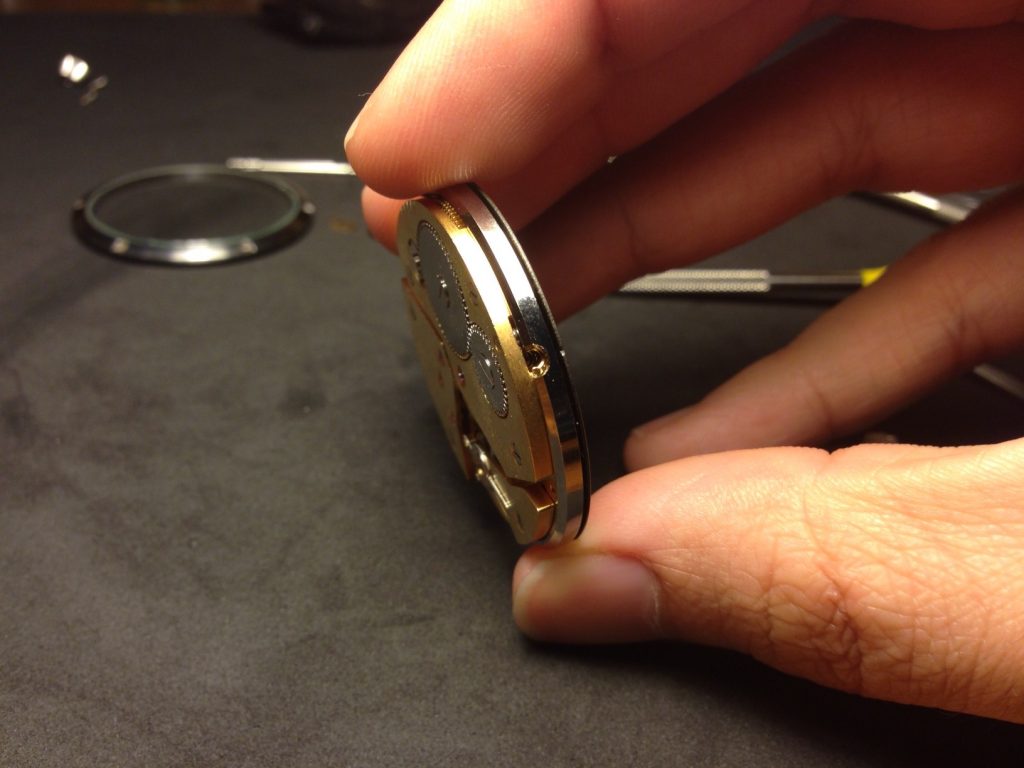
By this time, you must be sure that the crown is properly attached to the stem and the stem is the right length. You can now remove the movement from the watch case and set up the hands.
With the dial, movement, and the hands installed, insert the crown and stem into the movement. Fully push the crown and stem.
Then, pull out the crown when you hear the second click and turn it clockwise until you see the number date begins to change. Stop turning once the date is between two numbers.
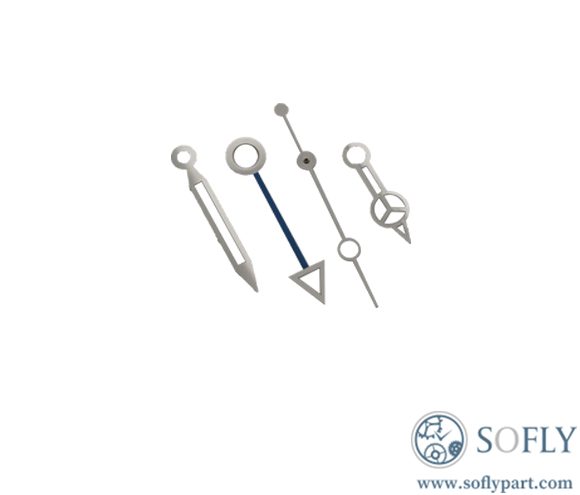
You may begin attaching the hour hand first. Pull out the crown on the second click to prevent the hands from moving. To avoid any scratching, put a dial protector.
Use a pair of tweezers to place your hand gently at the 12 o’clock point to match the date change. You would want the date to begin running over to the next day at midnight.
When you have already attached the hour hand, use a 1.5mm hand press to pressure it down above the post. For the minute hand, all you have to do is to repeat the process. But, you should use a 1.00mm hand press instead of 1.5mm to press down the minute hand.
Using again your pair of tweezers, put the second hand on the middle post. It greatly helps if you use a headband magnifier so you can see the small post better.
Use the flat end tip of your hand press to push the second hand over the post. The hands are quite fragile so make sure to use minimal pressure to avoid bending them.
After you install the hands, double-check that they are parallel to each other and the dial. Also, make sure that they are not touching each other. If they are angled or are touching, you can slightly bend them with a pair of tweezers. Remember to be extra careful and gentle as the tip of your tweezers could bend the hands.
To check the hands, pull out the crown and turn several rotations. Press the crown and make two rotations. See to it that the second hand turns around the dial freely.
You’re almost there! Just a few more things and you’ll finally have your own special watch! Now, on to the next step.
So in this step, you need to put the movement in the holder upside down. Make sure that this is the position so the dial is facing down as well. Use a dust blower or microfiber cloth to clean the interiors of the case.
You should be 100% sure that there are no dust and fingerprints in the case before you put the movement inside. Once you seal up your watch, you’d want it to stay flawless.
When you are absolutely sure that your watch is spotless, put the movement and dial with the case tube on your watch case.
Source: Esslinger
For the last time, put the crown and stem back in the watch movement. Press it down until you hear it click. This means they are securely in place.
Source: Tick Tick Tick Tick
Place the movement ring above the movement in the case. When doing so, you should take note of two things:
Be careful when you align the cut out with the stem. This is to prevent any damage to the case tube and stem when you attach the movement ring.
Press the ring gently until it is equal with all sides of the case. Please take note that it should have a similar height to the movement when it is fully secured in place.

Source: Pinterest
You need a spacer ring to prevent the parts from moving inside the case. This step is really simple. All you have to do is put the spacer ring on top of the movement ring.

Source: Pinterest
Before installing the rubber gasket, you must lubricate it with silicone grease. When the gasket is lubricated, it generally lasts longer.
Also, there are fewer chances of leaking, which means the movement remains moisture-free. Silicone grease also ensures the rubber gasket remains protected even when the back of your watch is taken off for upgrades and repairs.
But, be careful when you lubricate and prevent from using too much grease. You only need a small amount so you won’t get grease into the case and other watch parts.
Then, use a paper towel, grip the rubber gasket, and pull the entire length of it through the grease.
Now, slip the rubber gasket on the side of the case back border. Secure it with your thumb. Next, use your fingers to slightly stretch the rubber gasket so you can move it around the case back and fit it properly.
Source: Esslinger
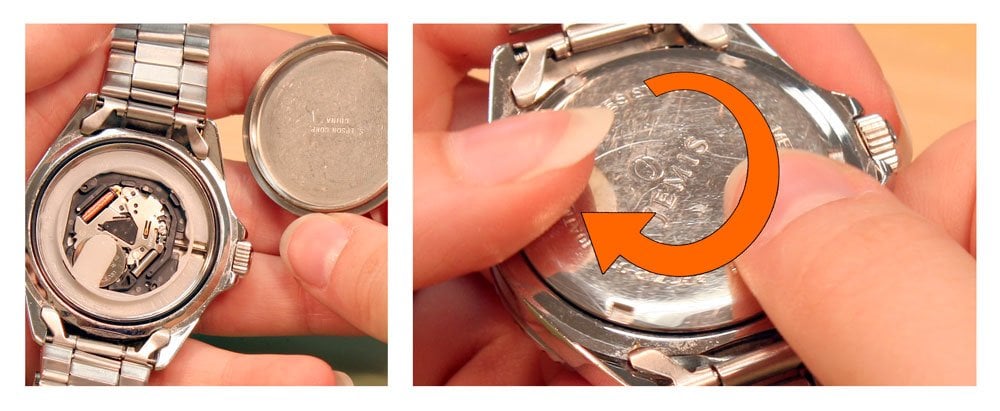
Now that you have lubricated the rubber gasket, it’s time to put the case back on the watch. Put your watch on a watch case holder. Then, put the case at the back and lock it.
Make sure to lock it by tightening it as much as you can with your hand. When you can no longer tighten it further, use a JAXA wrench or other similar tool to rotate it a quarter or a half to make it even tighter.
BUT, make sure you don’t tighten it too much since it might be really hard to remove it when your watch needs repair.
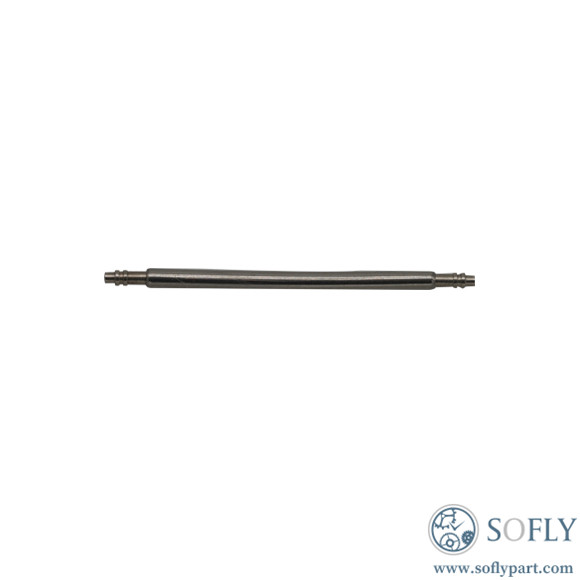
For this step, put the spring bars into the slots at the sides of your watch band. Next, hold your watch in a manner wherein the crown is towards the ceiling and the watch back is facing you.
Put the edge of the spring bar from the half of the band with the buckle into the slot on the lug found at the bottom. Be sure that the finished side of your watch band is in the same direction as your watch face.
With the forked end of your spring bar tool, push it down to the spring bar. You can use this tool as well to insert the spring bar beneath the lug and locate the opening.
Move your watch around the lug until you see and feel the spring bars pop in place. Turn your case and repeat the process on the other side of your watch band.
After repeating the process on the other half, guess what?
Congratulations! You finally made your own watch! So, what’s next? Set the time, of course!
Source: Dreams
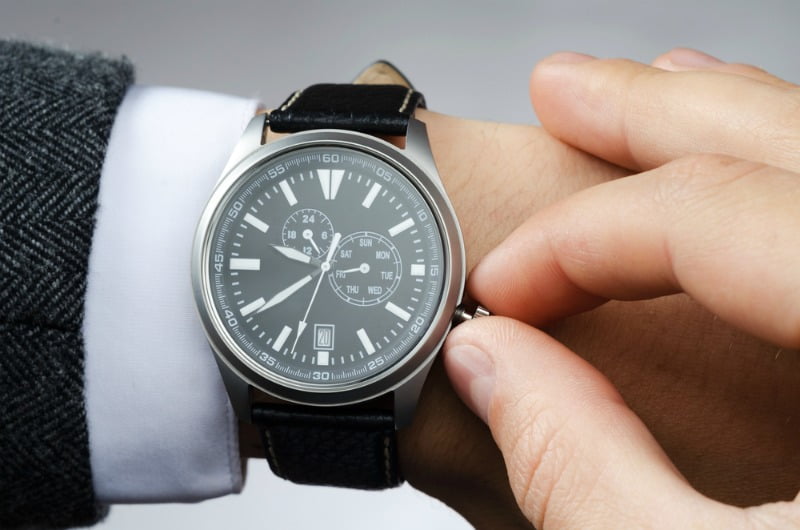
You can set up the time through the crown at the 3’oclock point. You can set it in two positions, in the first or second click.
When you adjust the date, pull out the crown and put it in position 2. Then, rotate it clockwise until you reach your preferred date. Now, pull out the crown to position 3 to adjust the hour and minutes.
You can rotate this both clockwise and counterclockwise to adjust the time. When you are done setting the time, don’t forget to press the crown back to position 1 to protect your watch from moisture and dust.
After doing all the steps, your watch is now good to go! While it took some time, it wasn’t that hard, was it? Anyway, this DIY watch will be worthy of your time!
We hope this tutorial was able to teach you how to build a watch.
Do you have some suggestions you’d like to share with us? Did we miss something? If so, we gladly want to hear them. Please share them in the comments section!